
 English

Full description
Reviews
Business Card Printing Specifications
Dear Customer:
Business cards are automatically generated by the system. For your efficiency, please follow the rules below!
I. Order Placement Considerations
- 01、File Format: Recommended formats: CDR (versions 14-20), AI, PDF. JPG format is acceptable but requires at least 300 DPI. Lower resolution may result in poor printing quality.
- 02、Multiple Files: Files with the same requirements can be ordered together, just modify the data accordingly.
- 03、Different Specifications: Files with different sizes, quantities, or requirements must be submitted separately.
- 04、Bleed Area: Add 2-3mm bleed to the design file. For example, a 90×54mm finished size requires a 94×58mm artwork size. Content should be at least 2mm from the finished edge.
- 05、Color Consistency: Avoid mixing images with different color schemes (e.g., red and green images) to prevent color differences in the final product.
- 06、File Naming: When uploading multiple files, especially JPG formats, use standardized naming conventions. Verify front and back sequence before confirming the order.
- 07、Quantity: Customizable as 200 pieces per package.
Note: Color mode must be CMYK with at least 300 DPI. Colors other than JPEG should be pure white. To avoid content changes, CDR files should not undergo high-to-low version conversion operations.
II. File Preparation Guidelines
01、Bleed: Add 2mm bleed on all four sides. Bleed content should match the file content (finished size: 90×54mm, bleed size: 94×58mm).
02、Safe Zone: Keep effective content at least 2mm from the finished edge (if measured from the bleed line, this should be at least 4mm).
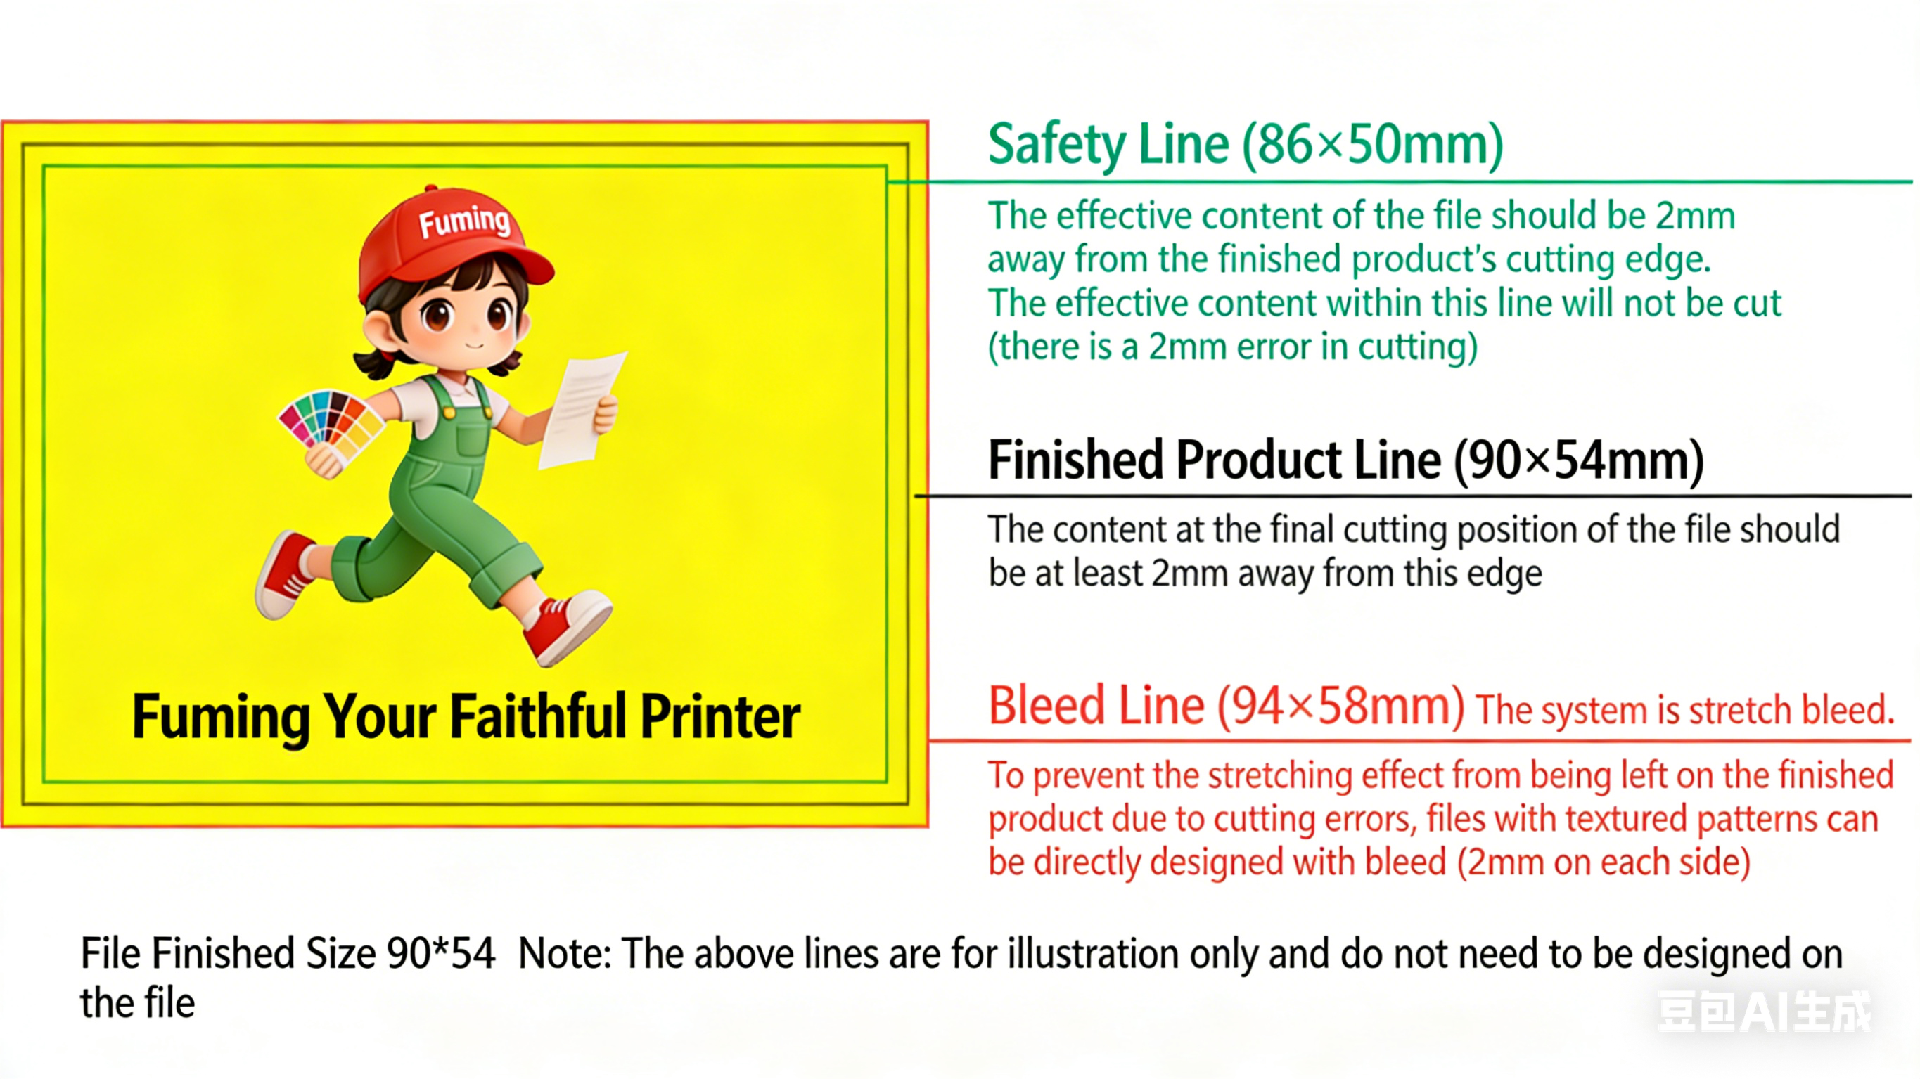
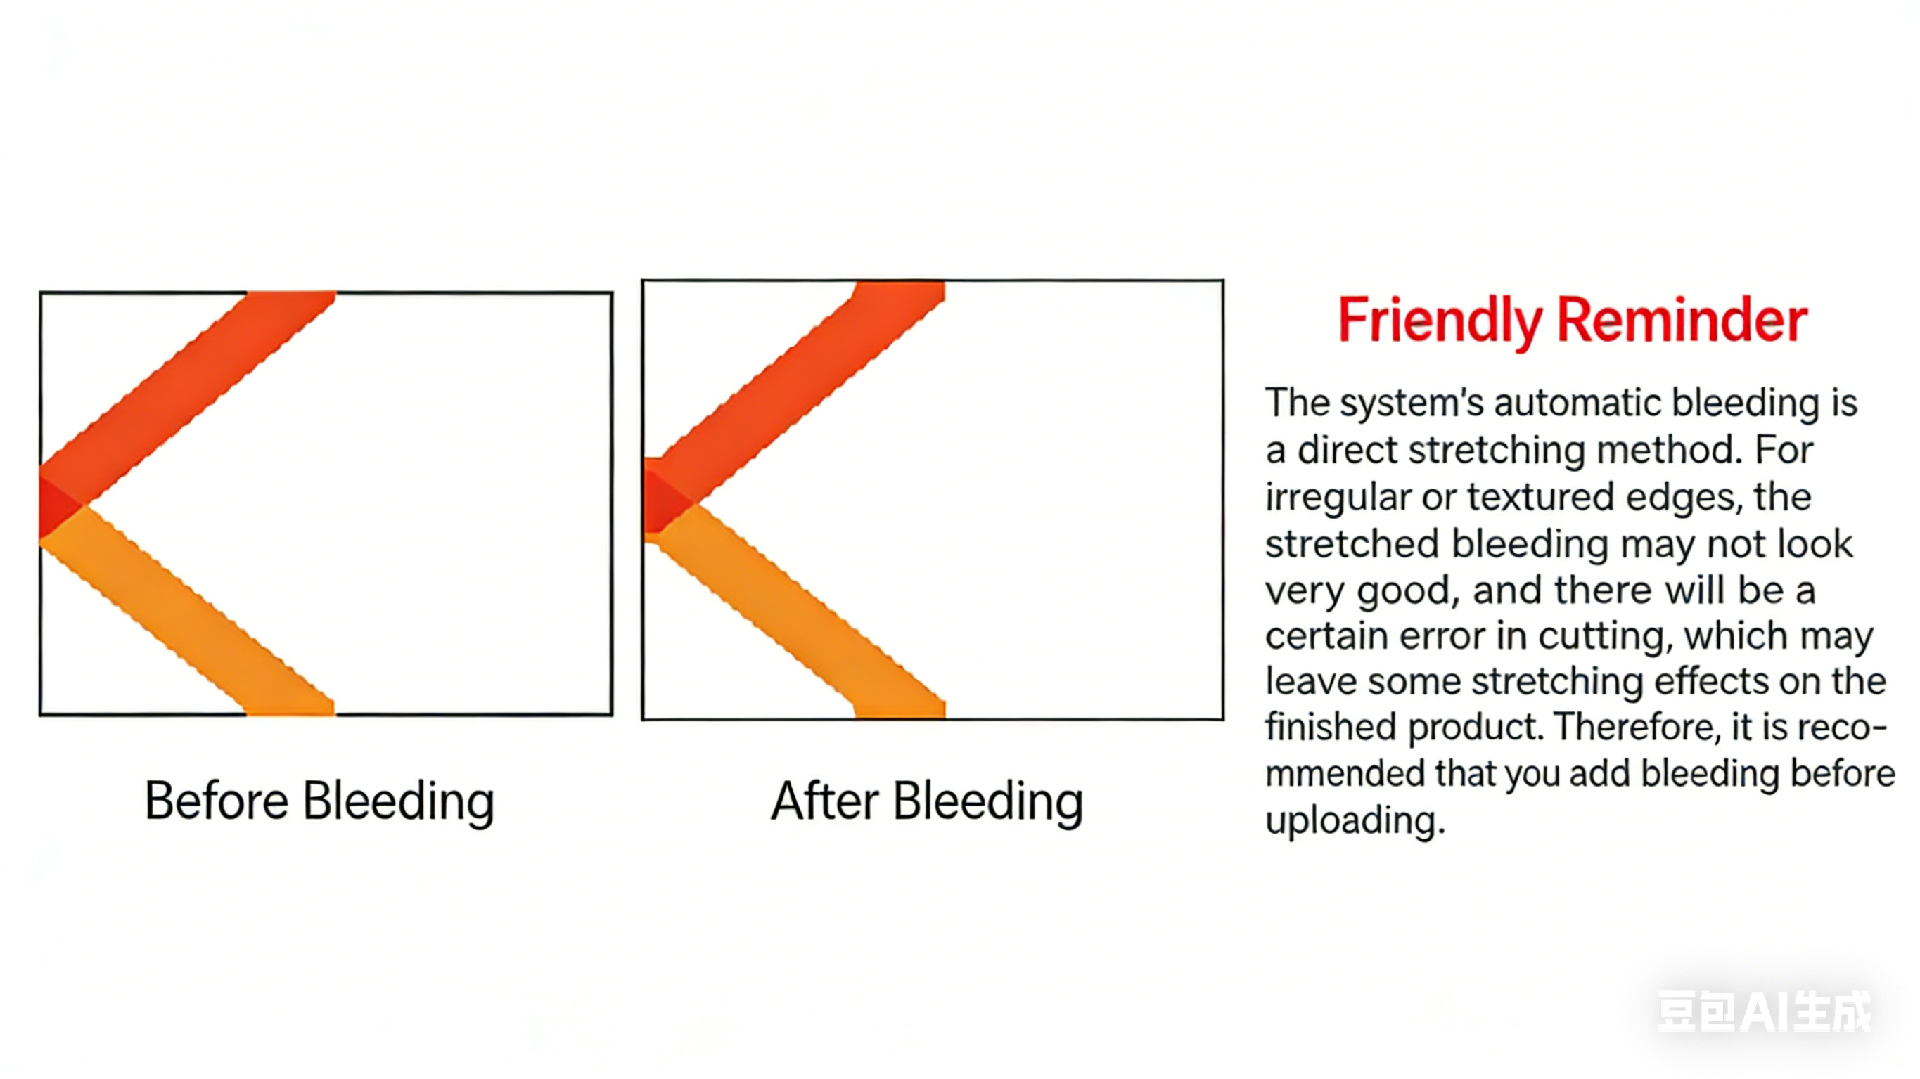
Friendly Reminder: System automatic bleed is applied directly for production. For irregular or flawed corners, manual bleed is recommended. Bleed line length should be determined based on actual needs, generally controlled between 1-2mm.
III. File Layout Standards
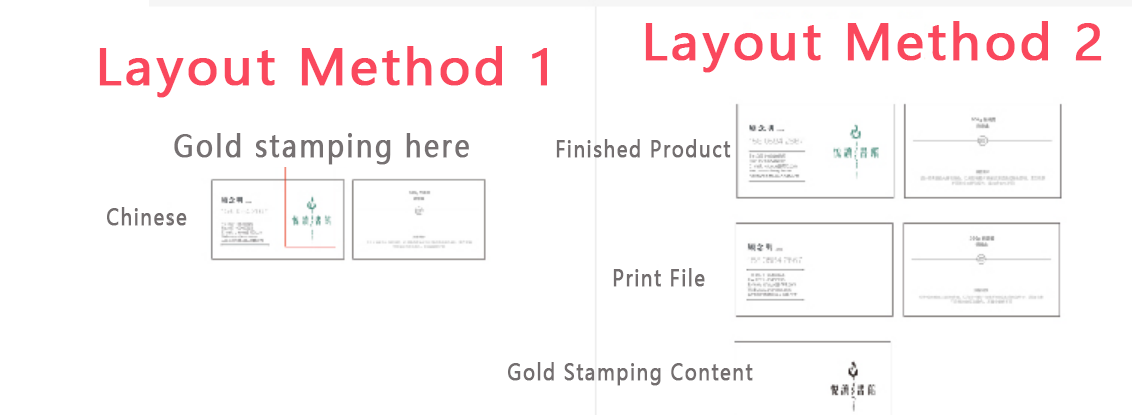
01、CDR Format Layout Standards
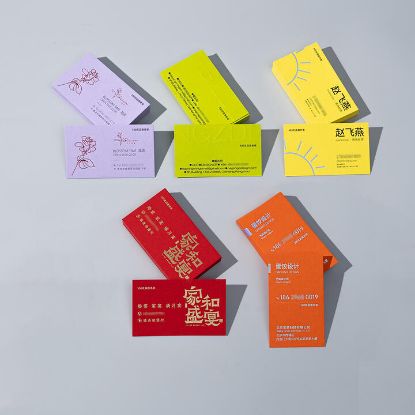
• a. Front side should be laid out separately, placed left and right with at least 5mm spacing (default: left-right arrangement represents front-back sides).
• b. For multiple card designs, place different types sequentially below the front and left-right arrangement.
• c. For double-sided identical designs, duplicate the file and place them left and right.
• d. Content other than printing files (such as text notes, multiple line frames, etc.) should be arranged separately.

02、JPG Format Layout Standards
• a. One file for front side, one file for back side.
• b. If there are blank pages, indicate which side is blank in the file name.
• c. For double-sided identical designs, duplicate the file.

03、PDF Format Layout Standards

04、AI Format Layout Standards

IV. Post-Press Design Considerations
01、Rounded Corner Process Considerations
• Design files should have right angles. Avoid placing important information in the four corners.
02、Hot Foil Stamping Design Considerations
• Hot foil stamping requirements: Foil stamping positions must provide editable vector files. Lines that are too thin may not foil properly (minimum 0.2mm). Foil text should not be smaller than specific size requirements. Foil stamping has a 2mm margin of error. Maintain 2mm spacing between printed content and foil content. Edge-to-edge foil stamping is not recommended (small plates require 4mm gaps).
03、3D UV Process Design Considerations
• UV positions must provide editable vector files. Small areas like text and lines are suitable for glossy effects. Large areas like circles and color blocks are suitable for matte effects. The same side can have both glossy and matte effects. Avoid designing UV positions too close to the finished edge to prevent edge bursting.
04、3D Cold Foil Process Design Considerations
• Cold foil positions must provide editable vector files. Text is recommended to be 9PT or larger. QR codes are not recommended for 3D cold foil as it may affect scanning functionality. Avoid designing cold foil positions too close to the finished edge to prevent edge bursting. This process is suitable for brand logo printing (high brightness, eye-catching types, contour line decorations, etc.).
05、Embossing Process Design Considerations
• Embossing is the process of creating a depressed surface from the front or back of the paper, suitable for thicker paper stock. The effect shows as depressed on the front with slight traces on the back.
• Considerations: Embossing lines should not be thinner than 0.2mm. Blind embossing text should be larger than 7PT. Blind embossing has more visible effects than raised embossing.
06、Debossing Process Design Considerations
• Debossing creates a raised surface from the back of the paper, appearing raised on the front and depressed on the back. Avoid placing important content in the debossing position. Debossing lines should be at least 0.2mm thick. Small lines and text may not show clear effects in debossing.
07、Special Color Printing Process Considerations
• Special color printing plates are tools created by designers for plate making, without raised texture. The main difference from hot foil stamping is that hot foil uses high temperature and pressure with foil plates, creating brightness and tactile texture.
• Process accuracy can be referenced in the diagram below
Fuming Printing - Your Trusted Printing Partner
Specification Version: 1.0 | Update Date: October 2023
Related products


life time warranty
highest quality parts
price promise
collect&deliver